


ALL >> General >> View Article
Complete Guide To Use Cricut Print And Cut


Print then cut is the best feature of Cricut- if print and cut is new for you or you are seeking troubleshooting tips, you have landed in the right place. This blog will cover everything about the Print and then cut features of Cricut in greater depth. 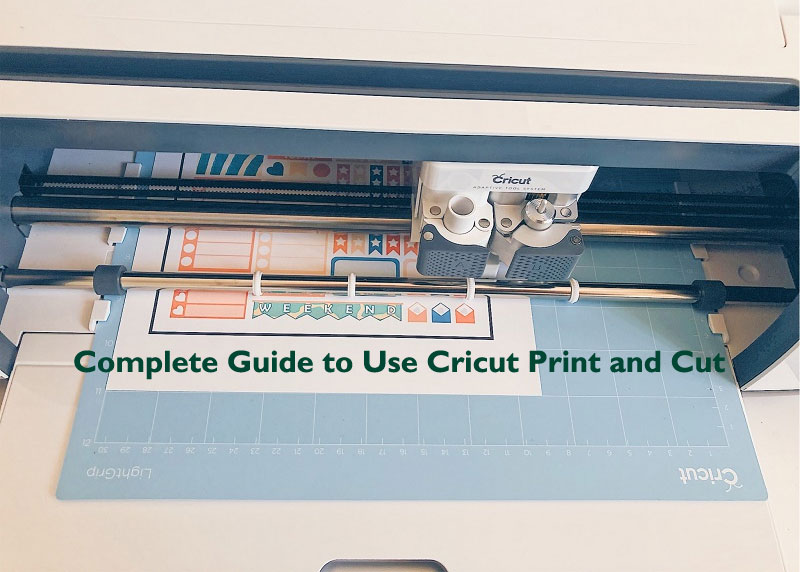 The Print then cut function in the Cricut Design Space program is the best way to ease crafting. From creating your stickers at home to cutting designs for scrapbook pages, there are many unique methods to use this simple feature. Although the feature is the best option for artisans, some must-know suggestions make the Print then cut feature much simpler.Also Read: Everything you need to know about using Cricut Design Space ...
... /strong>Introducing Cricut Print then Cut FeatureThis easy-to-use function is a game-changer in the Cricut Design Space software is a simple way to print out the graphic design, then cut out your design using the Cricut machine. The feature is accessible on Cricut Explore and Maker, making it the best method to use your desired crafting devices. The only disadvantage of this feature is that it’s not presently available on the Cricut Joy machine.  Using the Print then cut feature is best for a wide range of craft projects, such as: Creating your planner stickers at home. You can make gift tags and greeting cards for family and friends. Cutting out images with the graphic design for the scrapbook. Print designs on vinyl to insert the latest project and more. Methods to Use the Cricut Print then Cut FeatureFirst, you must launch the Cricut Design Space app on your desired device, upload an image, and make your design. Ensure you have picked the image file you wish to use & set them to a line cut and fill as print. Ensure you have flattened and attached the images to print different layers together. Tap on the Make It icon and check your mat. If all looks perfect, then press the Continue button. Then you will view the Send to Printer option. You can print from any desired printer. If you have already chosen to print with the bleed, there will be no white border left and permits for a precise border. Next, choose the material you have printed from the available list. Put the material on the mat at the top right side of the StandardGrip mat. After that, load it into your Cricut machine; it will take a few seconds to detect the registration marks. Tap on the Go button to complete the procedure. Lastly, remove the mat from your machine and peel up the paper you are using for the project.What kind of Images can be cut with the Print then Cut Feature?Users can Print the Cut all images they can upload to Cricut Design Space or through Cricut Access. In simple words, anything you can put on the Cricut Canvas area- where your design can print and then cut. Also, you can print & print the text you write in the Design Space, upload patterns or shapes filled with Cricut, and much more.Also Read: Cricut Explore vs Cricut Maker: Which Is Right for You?Images with the Firm BackgroundThese kinds of images need extra work as you should isolate the image you wish to cut. Once you upload the pictures, Cricut cannot read what your image is about. It can read the edges of the picture. So, you must delete the background unless you need to cut the entire thing and not anything inside. This type of image has certain extensions; you can identify them when they end in .gif, .jpg, or .bmp.Also Read: How to Weld Text and Images in Cricut Design SpaceFor instance, if you wish to cut a single dream with the star, you would require to delete the background color; otherwise, you will print the complete design. You can do this task in the Cricut Design Space easily. Pictures with the Transparent Background These images are the best fit as you will find the main text, element, and image you wish to cut on a transparent background. Although, these pictures can lose a few of their quality and look capricious if you increase their size. You can identify these images when they end in .png. Also Read: How to Remove Heat Transfer Vinyl from a ShirtThe little white and gray squares show transparency. Thus, you do not need to delete the background. If you adjust this picture as a Print, then Cut the Cricut blade will go around the world and the star as this is a single picture, so you cannot separate the start at the background from the word. Vector ImagesVector images are best for use across the Cricut Design Space program. They are also known as Cut files or SVG. The best of SVG files is that users can adjust the size without losing quality. You can identify these images when they end in .dxf or .svg. Also Read: Ultimate Guide to Cricut Tools and AccessoriesWith the vector files, users can also edit the start at the background and the word separately, switch colors and do anything they would not be able to do with PNG or JPG files. Tips to Troubleshoot Print then Cut ErrorsMany variables can create problems with the Cricut Explore or Maker machine’s capacity to correctly identify the Print then Cut sensor marks. Material position: You should place every printable material on the top left side of the sticky mat area and line up with the cutting mat grid markings. Wrong mat placement and wrinkles in the material can interfere with scanning the cut sensor marks. Lighting: Overhead reading lamps, direct sunlight, and any other lighting coming toward the Cricut machine can interfere with the Print then Cut sensor light. So switch off the direct lighting and then cut. Image Size:Remember the design or image fits in the 17.145 cm x 23.495 cm cutting area. If more extensive than this dimension, change the size to fit inside this dimension and re-attempt the Print then Cut project. Cut Sensor light:Ensure that the sensor light is clear. To clean the Print, cut the sensor light, and sweep softly with a clean, dry, small watercolor paintbrush. Confirm that the sensor light comes on when reading for sensor markings. You will find it underneath the carriage. System RequirementsMake sure your device fulfills the minimum system needed for Cricut Design Space. If it doesn’t fulfill those needs, create the Print the Cut project with the device that fulfills them. ConclusionThe Print then Cut function in the Design Space software is a setting that enables users to print their designs and then cut them. When you have a design or an element set to Print, then Cut, the Cricut Design Space app will transfer it to your printer and cut the design. This is an essential feature of Design Space, as you can create stickers, printables, homeschooling activities, and more. If you are new and still trying to understand Cricut’s software, then the above post can help you to learn more about the software.Source:https://hariguide.com/complete-guide-to-use-cricut-print-and-cut/
Add Comment
General Articles
1. Glass Ionomer Cement Fillings And Treatment ProcedureAuthor: Patrica Crewe
2. How Is Smelting Different Than Melting?
Author: David
3. Transforming Healthcare Revenue With Intelligent Ai Medical Coding Automation Solutions
Author: Allzone
4. Flirty Pick-up Lines Kya Hote Hain? – Complete Beginner Guide (2026)
Author: Banjit Das
5. Top 10 Altcoins To Invest In 2026:
Author: elina
6. Dog Photography Guide: Perfect Dog Images Kaise Click Kare (beginner Se Pro Tips)
Author: BANJIT DAS
7. On-demand Beauty Service App Development: Business Model & Revenue Strategy
Author: Rohit Kumawat
8. Industrial Fasteners: Types, Materials & Key Applications Guide
Author: caliber enterprises
9. How To Find High-quality Cat Images Online – Complete Guide
Author: BANJIT DAS
10. Animal Jokes Meaning – क्या होते हैं एनिमल जोक्स
Author: BANJIT DAS
11. Remove Negativity With Maha Mrityunjaya Jaap And Navgrah Shanti Puja
Author: Pandit Shiv Narayan Guruji
12. نبذة عن الجامعة الامريكية في راس الخيمة وكلياتها وتخصصاتها
Author: AURAK
13. Y1 Game: The Rising Trend Of Digital Play And Real Rewards
Author: reddy book
14. History Of Doctor Jokes – कैसे शुरू हुए मजेदार मेडिकल जोक्स
Author: BANJIT DAS
15. Why Is Reeth U Sarvvah Known As India’s Best Astrologer And Numerologist?
Author: Reeth U Sarvvah